Setup local web server with Apache and PHP on OS X Yosemite
This a quick writeup of how to get a local web development server up and running on your Mac. Everything you need is preinstalled, and just needs to be configured. Some familiarity with the Terminal is presumed (e.g. how to start it).
After this tutorial you will have a working local Apache server with PHP, and I will show you how to create sub sites for each of your web projects directly from Dropbox.
This is an updated version of my article on Mavericks, as a few things have changed with OS X Yosemite and the upgraded Apache 2.4.
Update 2015-10-15: This guide will also work with MacOS 10.11 El Capitain.
Thanks to the people at Webucator this guide is now also available as a video, so check out their Apache Web Server training if you want to learn more.
Apache and PHP
As I said everything you need should already be installed on your new Yosemite machine, so go ahead and and write the following in a Terminal window:
httpd -v
This will show you the installed version of Apache, which is Apache/2.4.9 in Yosemite. Start Apache with the following command:
sudo apachectl start
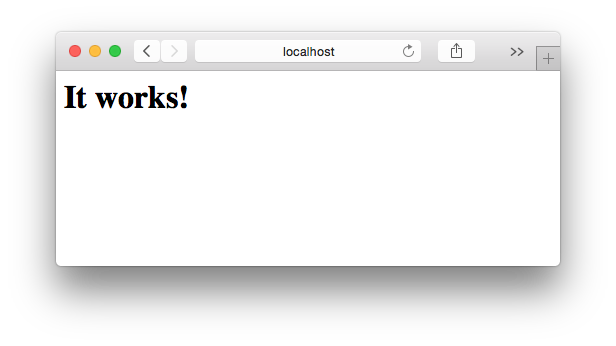
Now you can test that Apache is running by opening http://localhost in a browser. You should see the text “It works!”.
The document you are seeing is served from the system level web root, located in /Library/WebServer/Documents. We want to create a user level web root for our own projects, and we’ll do it all from the Terminal:
mkdir ~/Sites
Then we need to create a new user config for Apache (substitute your own user account short name):
sudo nano /etc/apache2/users/USERNAME.conf
Paste the following config into the Terminal editor:
<Directory "/Users/*/Sites/">
    Options Indexes MultiViews FollowSymLinks
    AllowOverride All
    Require all granted
</Directory>
Press CTRL+O and then CTRL+X to save and exit.
Now we have to enable using our own user directory to serve files:
sudo nano /etc/apache2/httpd.conf
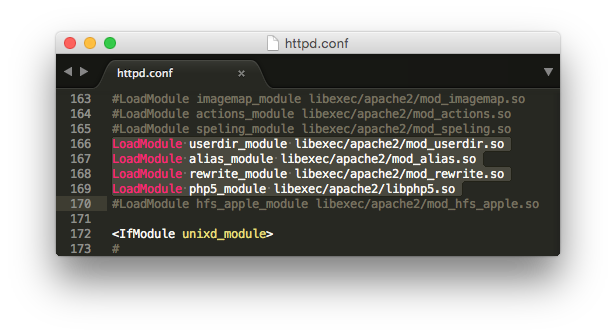
Use CTRL+W to search within nano and search for “userdir”. Uncomment the following lines (remove the leading #):
LoadModule userdir_module libexec/apache2/mod_userdir.so
LoadModule alias_module libexec/apache2/mod_alias.so
LoadModule rewrite_module libexec/apache2/mod_rewrite.so
LoadModule php5_module libexec/apache2/libphp5.so
You config should now look something like this:
Do the same search for “userdir“ again, and also uncomment the following line:
Include /private/etc/apache2/extra/httpd-userdir.conf
Press CTRL+O and then CTRL+X to save and exit.
Then we need to make a final change:
sudo nano /etc/apache2/extra/httpd-userdir.conf
Uncomment the following line:
Include /private/etc/apache2/users/*.conf
Press CTRL+O and then CTRL+X to save and exit. Restart Apache for the changes to kick in:
sudo apachectl restart
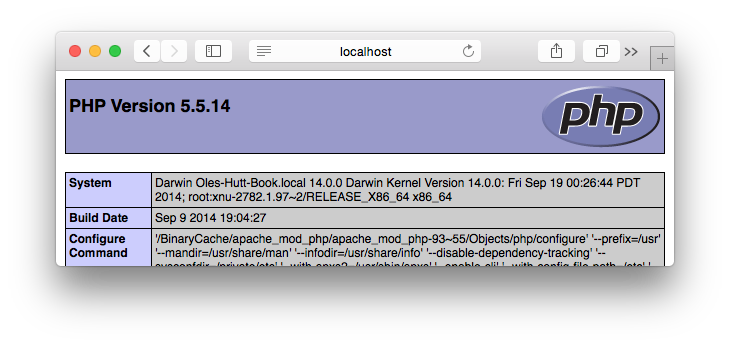
To test that PHP is now working, create a PHP test file in your new user level web root (~/Sites) with the following command:
printf "" > ~/Sites/phpinfo.php
Test it by opening http://localhost/~USERNAME/phpinfo.php in a browser.
If you want Apache to start up automatically after a restart, you can run the following command in the Terminal:
sudo launchctl load -w /System/Library/LaunchDaemons/org.apache.httpd.plist
Run sites from Dropbox
Now we actually want to develop and test some websites locally, and if you are like me, they are all located in Dropbox. It would be quite a pain to copy the project to ~/Sites every time we make a change, so why not just create a reference to it?
Let’s say you have a web project in ~/Dropbox/Projects/MyWebsite, let’s create a symbolic link to it in our ~/Sites folder:
ln -s ~/Dropbox/Projects/MyWebsite ~/Sites/MyWebsite
We are not quite there yet though. Due to some probably quite reasonable security restrictions, we have to grant Apache access to read and serve files from this Dropbox folder. With the following we grant access to the entire Projects folder, but you can be more/less restrictive:
chmod a+rx ~/Dropbox/Projects
To test your site open http://localhost/~USERNAME/MyWebsite in a browser.
You might run into some permission issues with Dropbox. To fix this you have to use chmod +x on every folder in the path from user root. So if you have linked folder ~/Dropbox/MySites/SiteA, you have to use chmod on both ~/Dropbox, ~/Dropbox/MySites and ~/Dropbox/MySites/SiteA. And remember to do a restart of Apache after each change before you test.
This was just a quick tutorial to get your local development server up and running. If you think anything could be done easier or better in some way, please drop me a comment.